Learn how to add the Immerse SDK to your Unity project, authenticate users, set up your avatar, PIN pad and more
Summary
In this tutorial, we will implement the Immerse SDK in a Unity Project by creating a new "Scene 0" which will be used to authenticate the user. Once the user is authenticated, a new Unity scene is opened.
- Add the Immerse SDK to your Unity Project
- Log into the Immerse SDK and create an Immerse Project
- Configure for Meta Quest headset
- Create "Scene 0" (for user authentication on the Immerse Platform)
- Set up your avatar
- Set up the PIN pad
- Add OnConnectLoadScene1.cs
- Add Completion Script to main Scene
- Use the Immerse Report Builder to create a report hierarchy
- Generate a test PIN and launch application
- Check report
This example is specifically for Meta Quest headsets but can be adapted for other devices.
This tutorial is or enterprise developers only. If you require an enterprise account please contact us at support@immerse.io
1. Add the Immerse SDK to your Unity Project
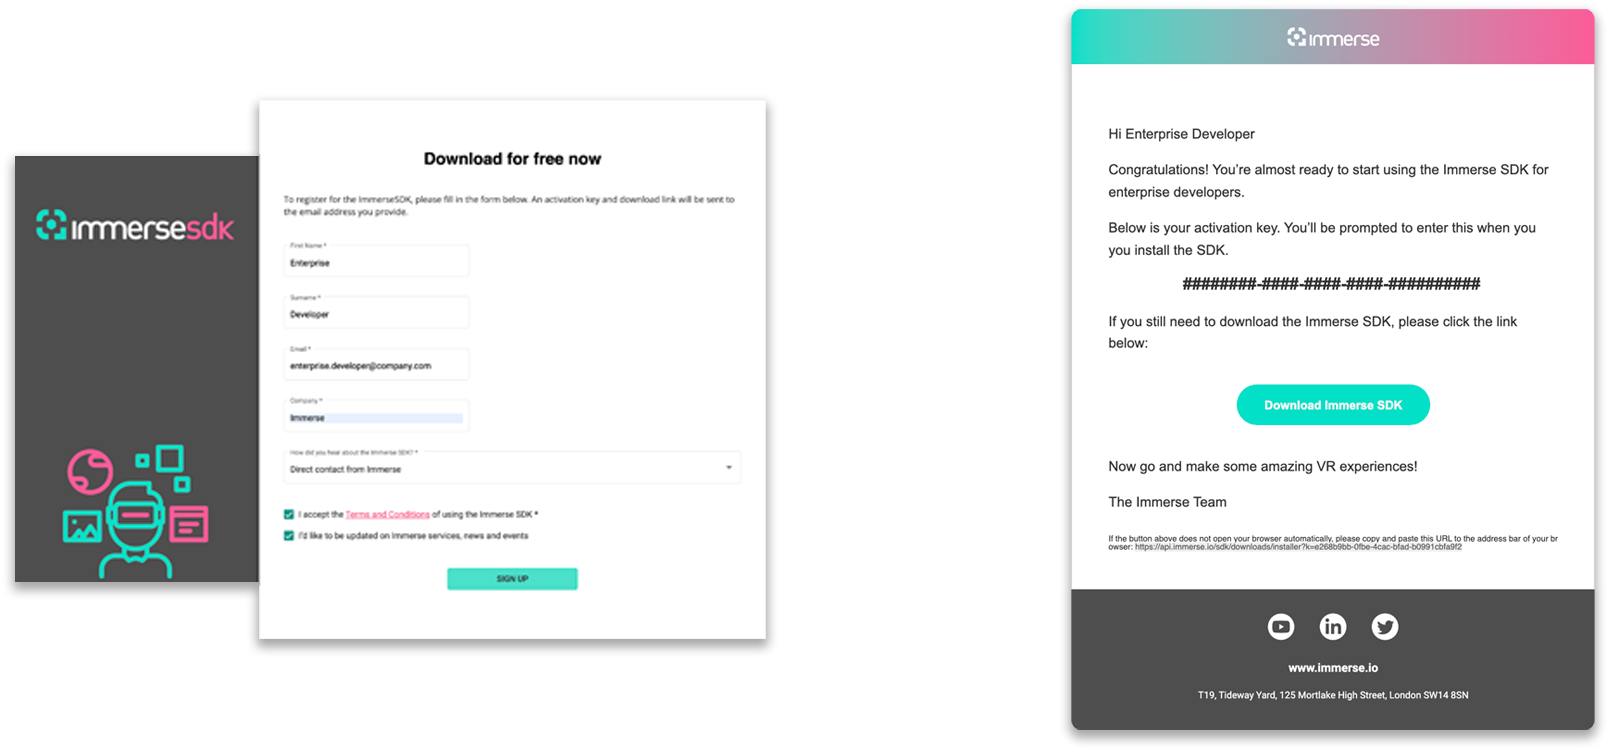
Follow these instructions to download the Immerse SDK installer. This will install the Immerse SDK, adding Immerse Unity packages to your project. During sign-up you will also receive an email containing an authentication key.
Once downloaded, import the .unitypackage into your Unity Project.
Once imported, the Immerse SDK Installer window should open:
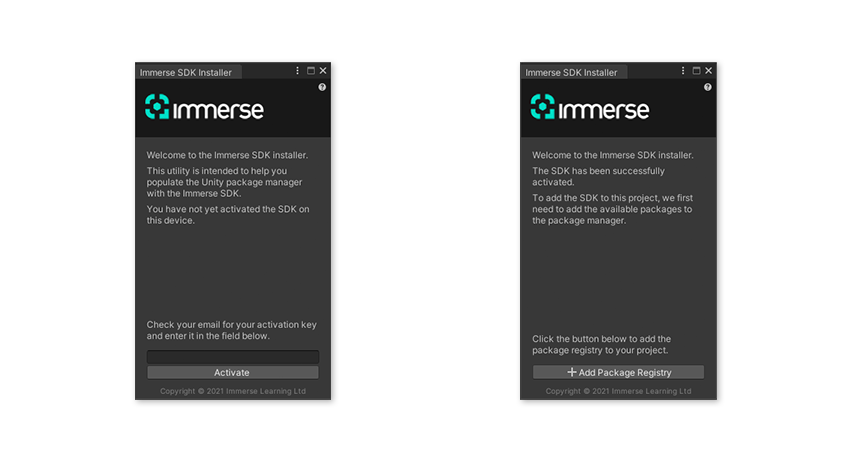
Enter the activation key received in your activation email. Activate and add the Package Registry.
Once activated, open the Unity Package Manager and install the latest versions of these Immerse packages:
- Framework
- Interaction
- Platform Services
- Reporting
If you can’t see these packages, try looking in Packages: My Registries
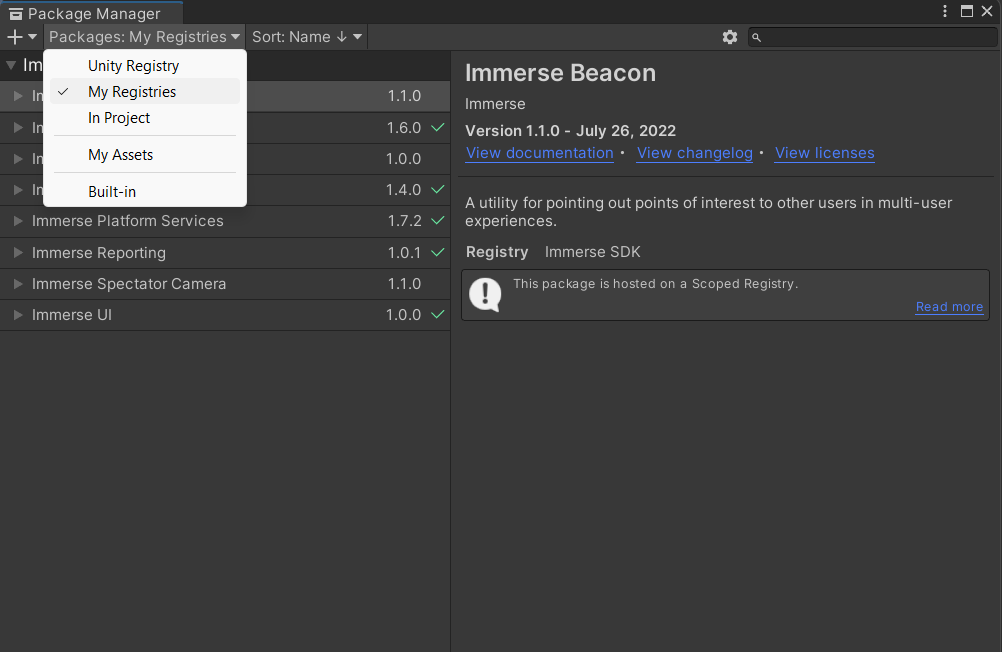
Ensure all your packages are up to date. Older versions of Platform Services won’t check for packages automatically, so it’s worth checking for updates before importing packages.
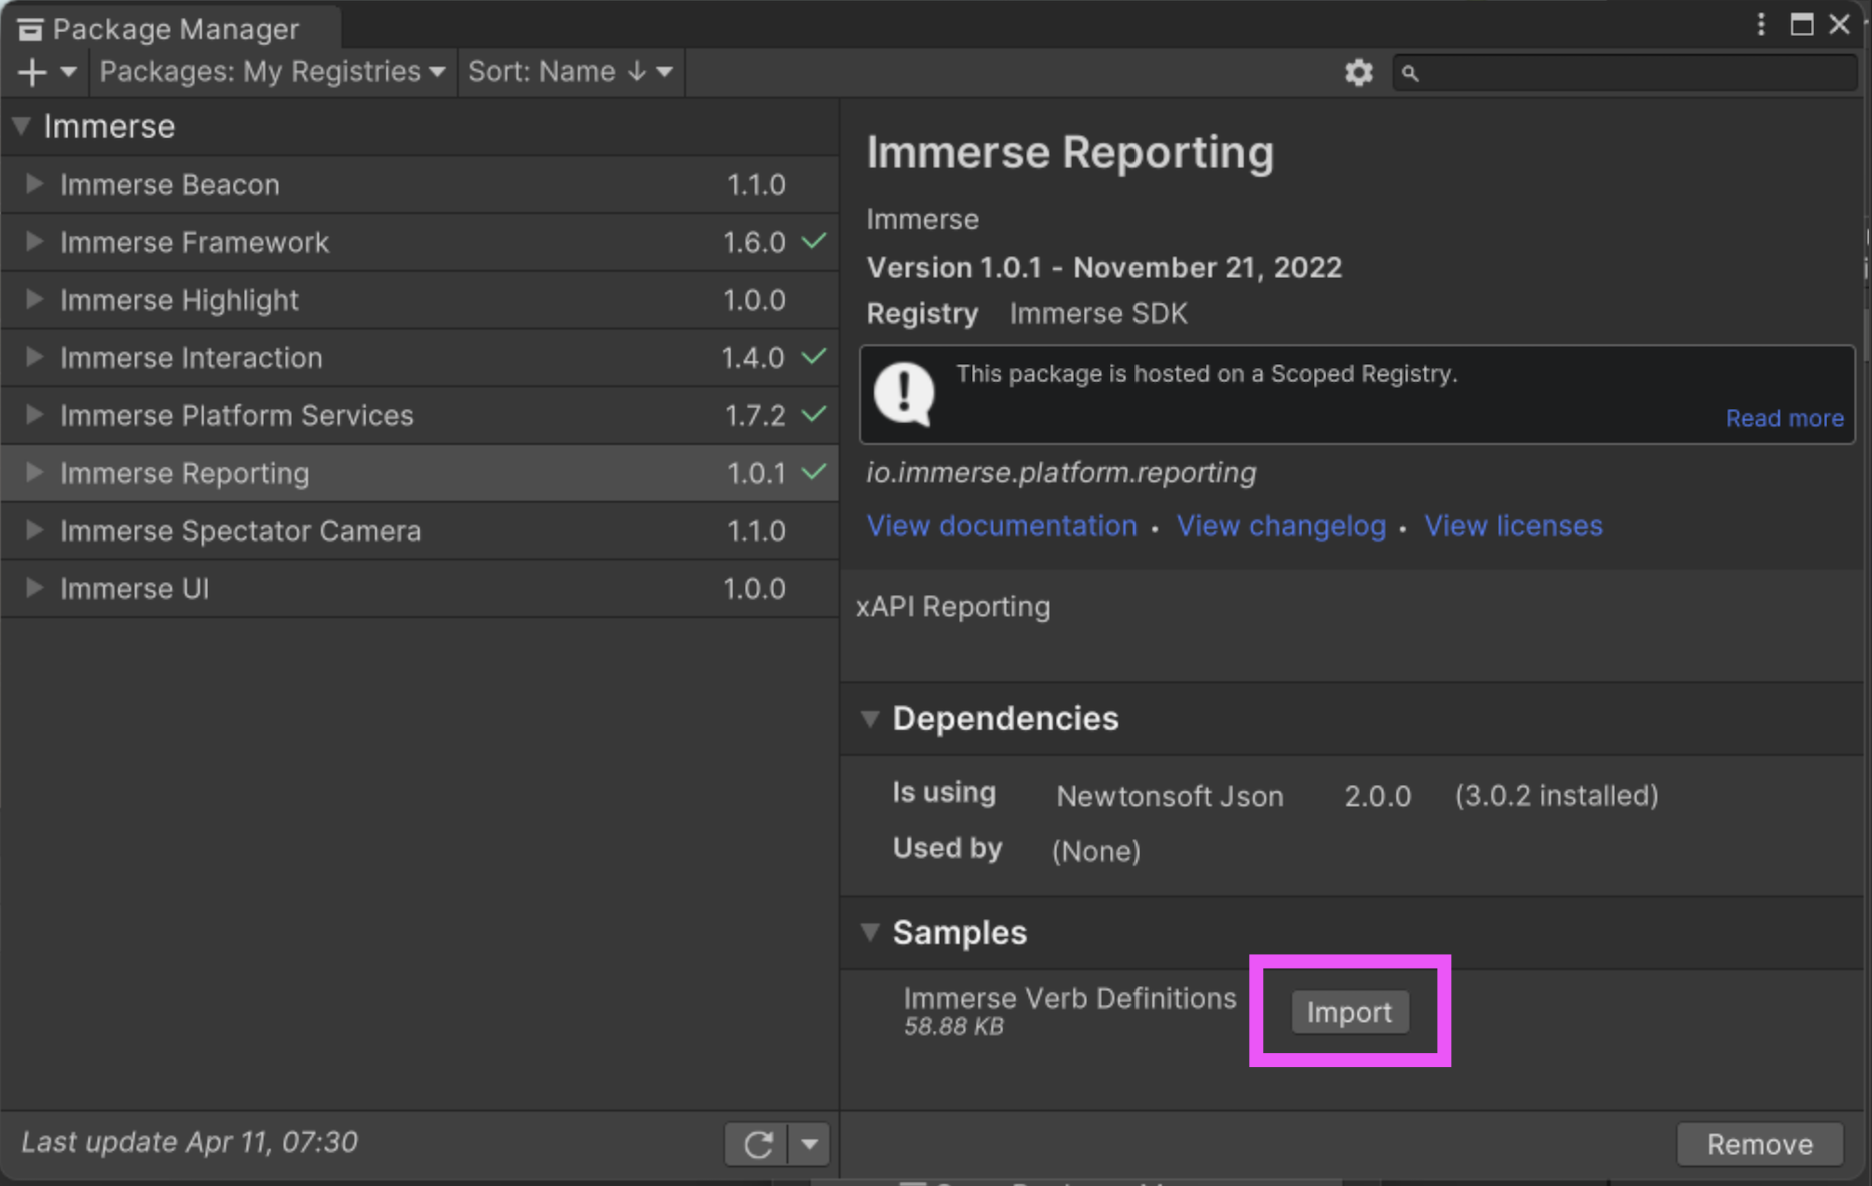
In the Immerse Reporting package, also import the Immerse Verb Definitions sample by clicking the Samples dropdown, revealing the Immerse Verb Definitions.
2. Log into the Immerse SDK and create an Immerse Project
Once the packages have been installed, log into the Immerse SDK at Edit > Immerse SDK using your Immerse Developer credentials.

You will be prompted to create a new project on the Immerse Developer Portal. Enter a version number in semantic format (e.g. 0.1.1), which will help keep track of each build. This is especially important for distribution.
3. Configure for Meta Quest headset
Go to Project Settings > XR Plugin Management, install XR Plugin Management and add the Android Oculus package

4. Create "Scene 0" (for user authentication on the Immerse Platform)
Create a new Unity scene. This will contain the PINpad component, which will be used to authenticate the user. Once the correct PIN is entered, they will automatically moved to another Scene.
Create a new GameObject. We’ll attach a script to this later.
Delete the camera component in the Main Camera GameObject
Open the Unity Build settings, and ensure your Scenes In Build list has the relevant changes to ensure that your “Scene 0” is the first in the list. This will ensure the script we add later can find your scene easily, and also as the PIN Pad will appear before the main content.

5. Set up your avatar
For the PIN input scene, we’ll use a generic avatar, included with the Immerse SDK. This serves as an XR Rig which allows the user to use the hands within the application to input a PIN.
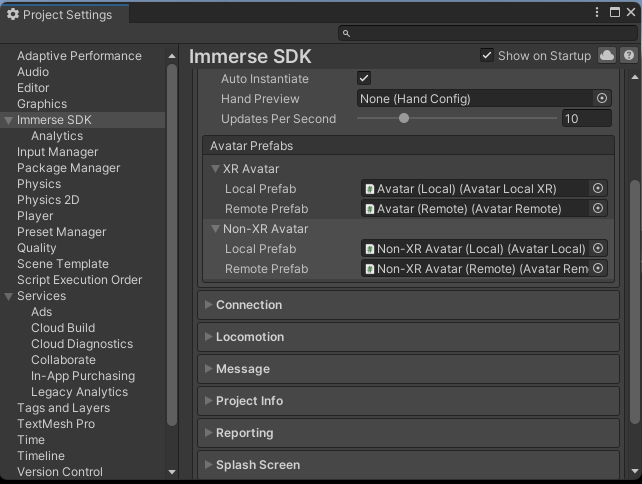
Locate the relevant Avatar prefabs in Packages > Immerse interaction > Runtime > Avatar > Avatar Prefab and drag them in their respective boxes.
Using other avatars within the PIN input scene can cause issues when interacting with the PIN pad, as we map the view of the PIN Pad to where this XR Rig is, and other interactions. You could also configure your avatars to be compatible with the PIN pad.
6. Set up the PIN pad
An Immerse PIN Pad component is used to authenticate users, once they launch an application on their headset.

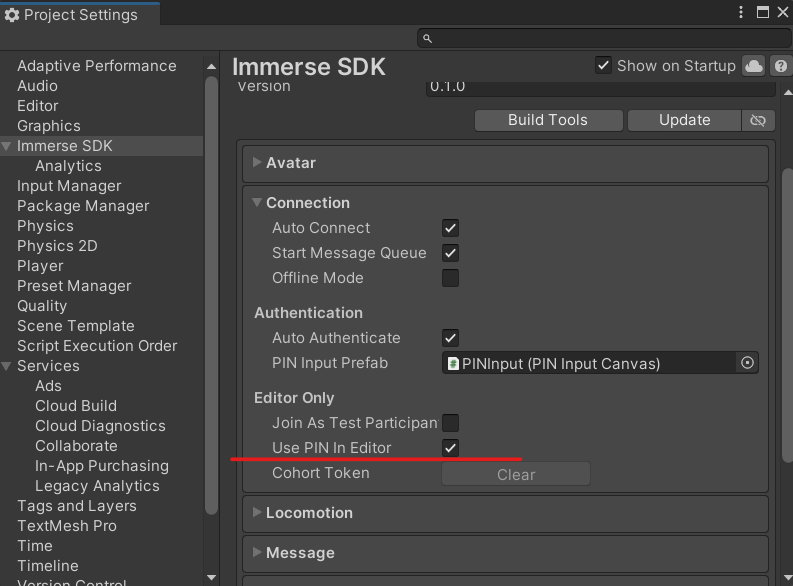
Look in Project Settings > Immerse SDK > Connection > Authentication > Pin Input Prefab - you should see the Prefab already preconfigured.

You can test the PIN in the editor by checking the Use PIN in Editor box in the Immerse SDK settings.
7. Add OnConnectLoadScene1.cs
Create a C# Script and name it OnConnectLoadScene1.cs. This will automatically continue on to the next Unity scene after successful authentication on the Immerse Platform.
using System.Collections;
using System.Collections.Generic;
using UnityEngine;
using UnityEngine.SceneManagement;
using ImmerseSDK.Interaction.Avatar;
using ImmerseSDK.PlatformServices;
using ImmerseSDK.PlatformServices.Multiuser;

public class OnConnectLoadScene1 : MonoBehaviour
{
    [SerializeField] private bool _disableImmerseAvatarAfterPinEntry;
    IEnumerator Start()
    {
        yield return new WaitForConnectionStatus(ConnectionStatus.Connected);
        if (AvatarManager.LocalAvatar && _disableImmerseAvatarAfterPinEntry)
        {
            AvatarManager.LocalAvatar.gameObject.SetActive(false);
        }
        SceneManager.LoadScene(1);
    }

}
8. Add Completion Script to main Scene
Open your main Scene. We will now add a component which will automatically send a Completion Statement to the Immerse Platform after a 5 second delay. Copy the C# Script snippet below and name it SendCompletionAfter5Seconds.cs. Attach it to a GameObject in your main Scene (not Scene 0).
using System.Collections;
using System.Collections.Generic;
using ImmerseSDK.Reporting;
using UnityEngine;
public class SendCompletionAfter5Seconds : MonoBehaviour
{
IEnumerator Start()
{
yield return new WaitForSeconds(5f);
SendCompletion();
}
public void SendCompletion()
{
if (GetComponent<ActivityReporter>())
{
GetComponent<ActivityReporter>().Report(true);
}
}
}
9. Use the Immerse Report Builder to create a report hierarchy
We'll now define a simple completion statement asset that tells the Immerse Platform that a Session has been completed
Go to Assets > Create > Immerse > Reporting > Report Hierarchy
Name your asset as CompletionReporter.asset and build as follows

Now drag the Completion Reporter asset to the Reporting > Module area in the Immerse SDK
.png?width=688&height=424&name=Untitled%20(22).png)
Next add a CompletionReporter script to any GameObject in your Main Scene. Add Component > Immerse > Reporting > Completion Reporter, dragging the CompletionReporter asset into the Target as below:

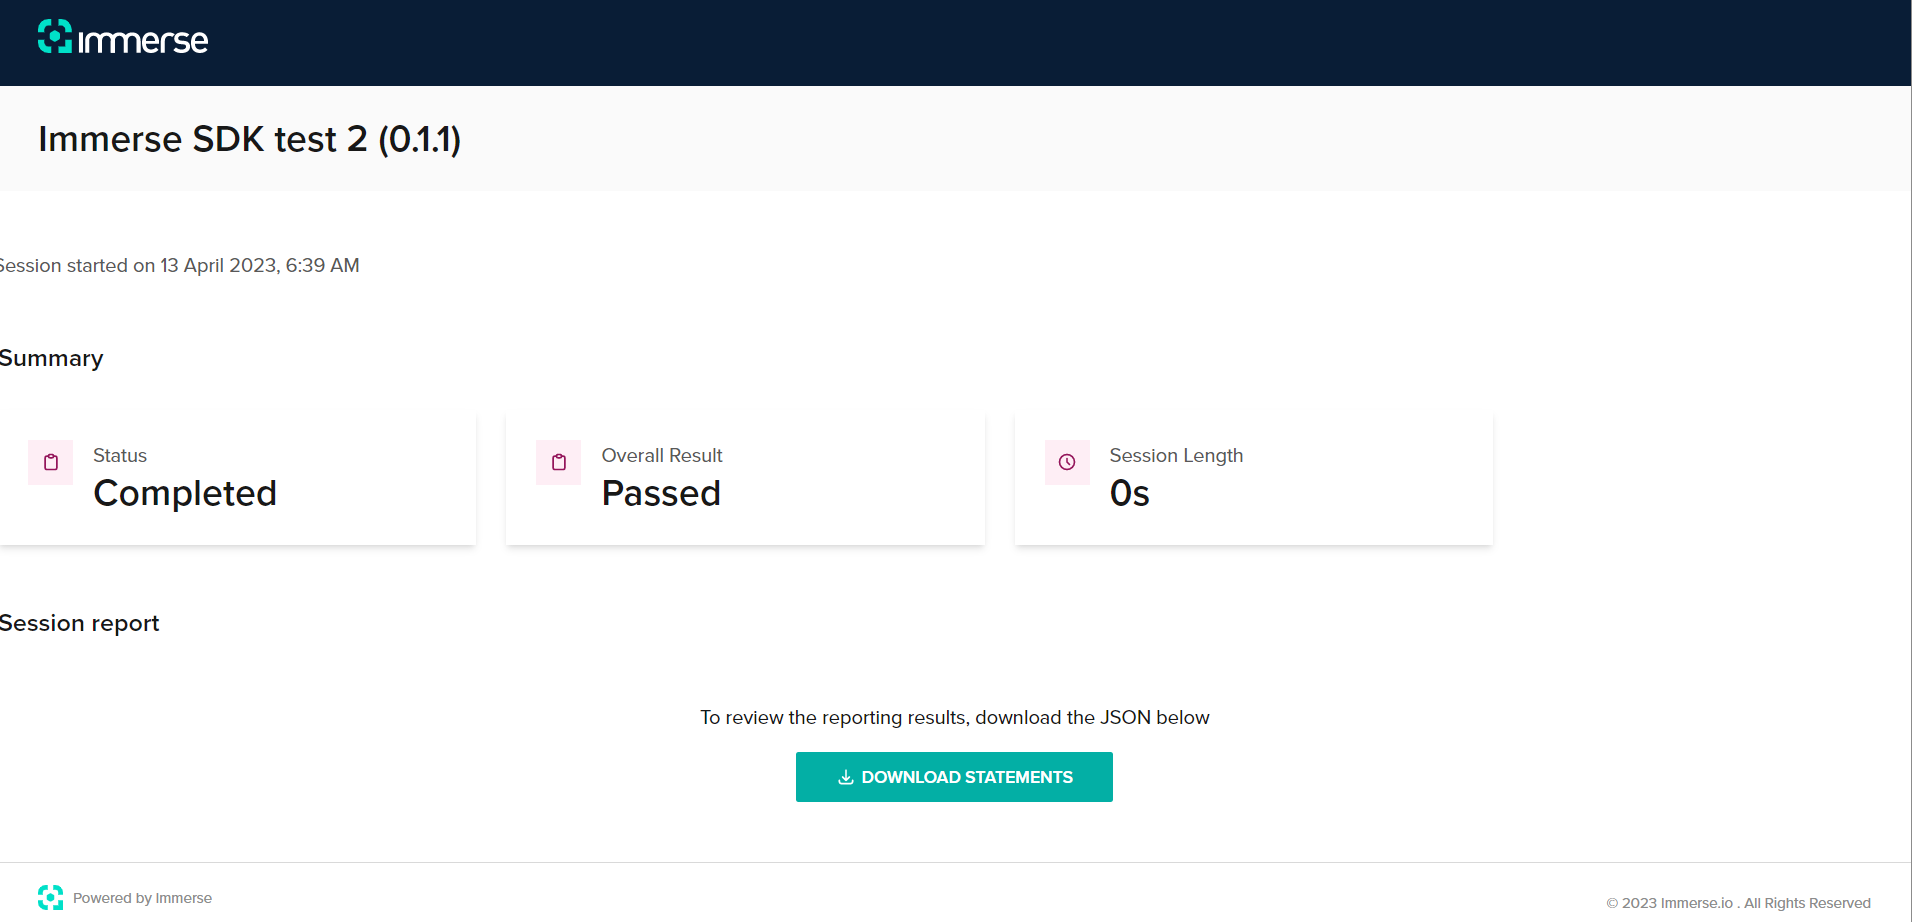
10. Generate a test PIN and launch application
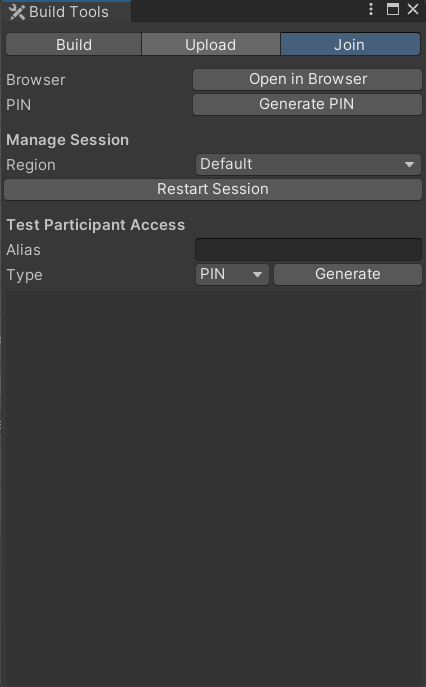
Now that the integration has been completed we now need to test the application. To do this, a test PIN needs to be generated. Open Immerse > Build Tools, and click Generate PIN in the Join tab. Note this number down.
Build and Run your application (ensuring that you include the required Scenes in the build). When launched you should see the Immerse PINpad in front of you. Enter the PIN you just generated. Wait a few seconds for the Completion Statement to be sent, then quit the application.
11. Check report
To check that the Completion Statement has been correctly received, go to Immerse SDK > Reporting and you should see data from your recent session.